Fish pond design and construction require careful planning, precise execution, and proper management to ensure the health and growth of fish while maximizing productivity. This article explores essential aspects of designing and building fish ponds, focusing on the different types of pond systems, key components of pond construction, and step-by-step procedures to guide you in setting up a successful fish farm.
Key Components of Fish Pond Construction
When designing a fish pond, there are four primary components that need consideration:
- Pond Structure: The physical design of the pond, including its size, shape, and materials used for construction.
- Water Source and Circulation: The supply of water for the pond and the system for water exchange, which affects water quality and fish health.
- Pond Floor: The base of the pond, which should be designed to ensure proper water drainage and reduce the risk of waste buildup.
- Pond Fittings and Equipment: This includes essential elements like water discharge pipes, filters, aeration systems, and shelters for protection.
How to Design a Fish Pond
Designing a fish pond involves selecting the type of pond system best suited to your needs, calculating the size based on the desired fish stock, and ensuring proper construction to support healthy aquatic life. Here’s how to design a fish pond step by step:
1. Assess the Location
- Ensure the site has a stable water source (e.g., well, stream, or borehole).
- The area should be flat or gently sloping to allow easy water drainage.
- Avoid areas with high groundwater tables, as they may affect pond integrity.
2. Determine the Size and Shape
- For small-scale operations, ponds can be as small as 10×10 feet, while large-scale farms may require several acres of space.
- The size and stocking capacity should reflect the fish type and growth rate you aim for.
3. Choose the Pond Type
- Consider various pond systems like hatchery, grow-out, or earthen ponds depending on your goals.
- The type of pond determines the construction materials (concrete, fibreglass, or earthen) and the water management system.
4. Design Pond Components
- Ensure proper water circulation and aeration to maintain good water quality.
- Plan for proper drainage and waste management systems.
- Include safety measures like fencing or shelters to protect the fish.
Types of Fish Pond Systems
Fish farms typically use two basic types of pond systems: Hatchery/Incubation Ponds and Grow-Out Ponds.
Hatchery/Incubation Pond System
The hatchery system is designed to raise juvenile fish (fingerlings) until they reach a certain size before they are transferred to grow-out ponds. This system can include:
- Hatchery/Incubation Pond Shed: Typically a structure measuring 12×12 feet, made from materials like blocks, wood, and a zinc roof to protect the fish from sunlight, rain, and predators.
- Hatchery/Incubation Pond: These ponds are often constructed using concrete, fibreglass, or wooden materials and can measure around 3 feet wide by 8 feet long with a depth of 20 inches. The pond’s floor is sloped to facilitate drainage.
Grow-Out Pond System
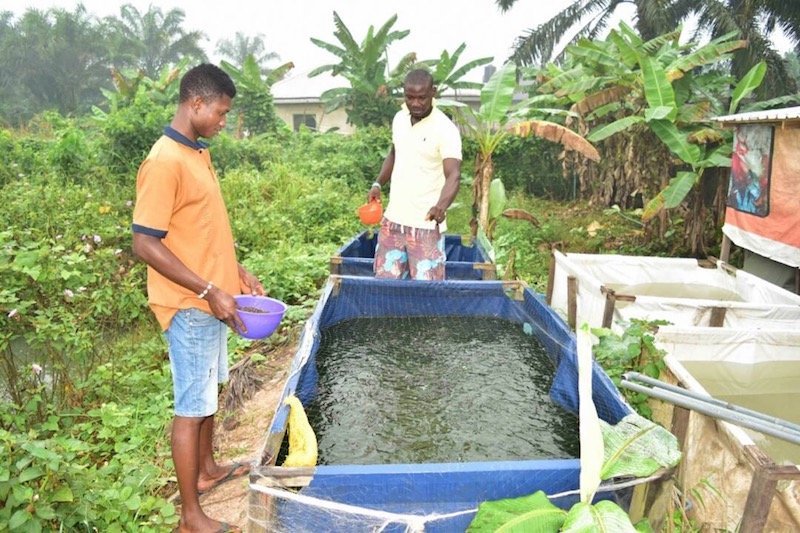
The grow-out pond is where fish are raised to maturity. There are different types of grow-out ponds based on water circulation:
- Stagnant Concrete Grow-Out Pond:
- Water remains in the pond until it’s visibly polluted or depleted. This system is cheap to construct but less efficient in terms of fish growth.
- Example: A 10×20 feet pond with a depth of 4 feet can stock 300 to 600 mature fish.
- Free Flow Concrete Grow-Out Pond:
- Freshwater flows continuously into the pond, and wastewater is discarded. It’s more efficient than the stagnant pond but results in high water wastage.
- This system supports better fish growth and faster production, but it is less water-efficient.
- Water Re-Circulatory Concrete Grow-Out Pond:
- The most advanced and water-efficient system. Water is continuously circulated and filtered, ensuring high water quality and dissolved oxygen levels.
- Though expensive to construct and maintain, it offers the best performance, with higher stocking rates and faster fish growth.
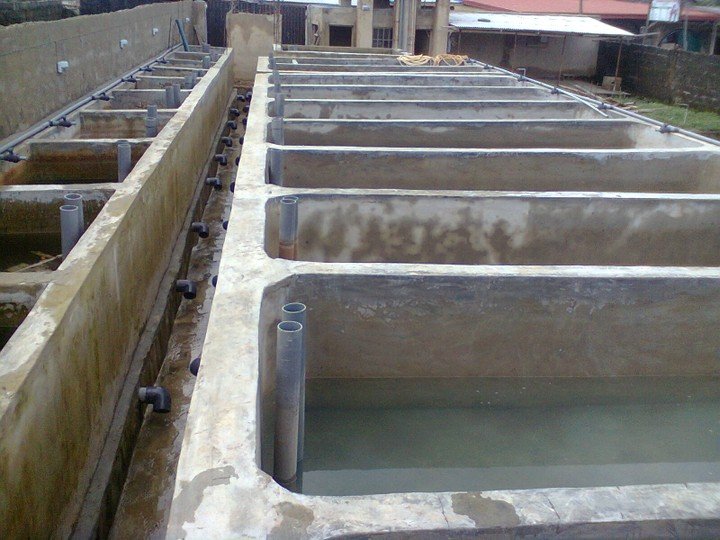
Construction of a Concrete Hatchery/Incubation Pond
Here is a detailed process for constructing a concrete hatchery pond:
Materials Needed:
- Flat land or area
- 6-inch hollow or solid blocks
- Cement, gravel, sharp sand
- Water, plastic pipes, mosquito netting, wooden pegs
- Tools: shovel, rope, twine, cutlass, and digger
Step-by-Step Construction:
- Site Preparation: Clear the land and level it to ensure even construction.
- Pond Foundation: Dig the foundation to about 3 inches deep, removing the dug-up soil. Pour a concrete mix (1:2:4 ratio) for the foundation.
- Building the Walls: Use blocks to construct walls around the pond, ensuring a height of around 1.2 feet to secure a water depth of 10 inches.
- Floor Slope: Slope the floor towards the water discharge outlet to allow easy drainage.
- Plastering: Coat the inner walls, floor, and outer walls with a cement-sand mixture (1:6 ratio) to prevent leaks.
- Install Drainage Pipe: Bore a hole in the lower side of the pond and insert a plastic pipe for wastewater discharge.
- Roof the Shed: Build a roof over the pond to protect it from sun, rain, and animals.
Grow-Out Pond Construction and Management
Once your hatchery ponds are ready, you can begin constructing grow-out ponds. These ponds are larger and need careful attention to water quality, aeration, and feeding.
For example, earthen ponds can be dug in swampy areas and stocked with 5,000 to 8,000 catfish, depending on the pond’s size. Ensure to lime and fertilize the pond for better water quality.
Pond Preparation and Stocking
For concrete ponds, allow the structure to dry for 5-7 days. Afterward:
- Wash the pond to remove excess cement.
- Fertilize the pond using poultry waste, fishmeal, or artificial fertilizer.
- Cover the pond with mosquito netting to prevent predators.
- After 7-14 days, you can introduce fish fingerlings into the pond.
Pros and Cons of Different Pond Systems
Earthen Pond System:
Pros:
- Cheaper to build.
- Larger stocking capacity.
- Rapid fish growth due to a natural environment.
Cons:
- Security concerns from poachers.
- Flooding during heavy rains.
- Difficult to manage water and fish.
Concrete Pond System:
Pros:
- Controlled environment for fish.
- Easier management of water quality.
Cons:
- Higher construction costs.
- Limited water circulation unless using advanced systems.
Conclusion on Fish Pond Design And Construction
Fish pond design and construction are critical steps in ensuring a successful fish farming business. Depending on your available resources, such as land, water, and capital, you can choose from different pond systems, including hatchery, grow-out, and earthen ponds. Proper preparation, correct stocking rates, and regular maintenance will help maximize productivity.
For those interested in learning more, there are resources available, such as fish pond design and construction PDFs, fish pond construction and management guides, and fish farm layout designs to support your venture. Whether you are designing a fish pond in Nigeria, constructing a concrete fish pond layout, or setting up a simple DIY fish pond at home, thorough planning and execution are key to achieving optimal results.
In part one of my series, I already discussed the profitability of the catfish farming business in Nigeria, in my next series, we shall be giving you more insights into HATCHERY TECHNIQUES/PROCEDURES OF REPRODUCTION. See you at the top.